So my last blog was more of an update. Here I will be discussing the details related to how I was able to plan and how I will be further planning our trip to Disney World.
When we will be going:
We will be leaving at the end of Trent's school May27 and staying through June 8th. When I researched more about crowds and when would be the best time to travel I had started off with four different times of the year in mind, Trent's spring break (mid-March), beginning of summer break (May 27), ending of summer break (July 13), and Fall break (beginning of October).
I found some crowd calendars on Pinterest. These three were by far the most useful: your first visit crowd calendar wdw prepschool crowd calendar and dadsguidetowdw crowd calendar. I found the most detailed was the wdw prepschool calendar as she broke down each month by date and further explained which parks are predicted to be more busy during each day.
Airfare:
As many of us from Hawaii know, going to the mainland it is usually very expensive and very uncomfortable to get to the west coast, let alone get across the country. When we went on our honeymoon to Alaska, we flew with Alaska Air and we were pleasantly surprised by how nice the service was and with how easy it was to fly with them, especially with flights that depart directly from Lihue to the west coast! So with that in mind I searched their website first to see if they even flew to Florida, to my excitement they do! Getting to Florida will be a 12hr flight, and returning home we will be making a pit stop in Seattle for a day to spend some time with the Wilsons (Bo's sister and her family).
I have not yet booked the flight because I am waiting to see if I will have enough miles for a one way ticket, I already have a $50 off coupon as part of my perks of having an Alaska air credit card (thank you to Bo's mom Eve for talking me into applying!).
Accommodations:
With this being Trent's first trip to Disney World I have elected to stay on Disney property, I had initially planned to split our time between two separate hotels, however when we looked at the logistics involved we were basically going to loose an entire day due to moving hotels. With our two travel styles differing so greatly I decided to let this one go and my husband won this round. We will be staying on Disney property the entire length of our stay...before you say it....GASP!!!
I know, I almost fell backwards too when he suggested such a crazy idea. When I stood back to look at it further and in more details, I realized that I would be saving myself a huge headache and a lot of hassle not having to deal with Bo being super grumpy and Trent being irritated with moving hotels and losing an entire park day because of this movement.
Because we will be staying on Disney property the entire length of our stay (11 nights) it took me a painstakingly long amount of time to research which hotel would be within an "affordable price range" for us and we wouldn't feel like we were ripped off because the hotel was "cheap".
I started with Disney's official website to do some initial research and I had decided to book through the mouse because I trust them and I know I am not getting scammed. I again used wdw prepschool, the mouse for less, trip adviser, and hotels.com to look up reviews and tips about each of the hotels.
I finally decided to stay at one of the moderate hotels versus the value hotels because of our travel styles. My husband is all about the convenience when we travel, where as I am always trying to find some ways of saving money. We both also like to dine at nicer restaurants and we like to have options as far as where we would like to eat. We also wanted options in pools. With our budget, wishlist, and travel styles in mind I finally decided on staying at the Disney's Caribbean Beach resort.
Tickets/Entertainment/Dining:
We purchased a package deal through Disney for our Hotel, Disney tickets, Magic Memory Maker, and Disney Dining plan.
The perks of staying on property, and the value of the dining plan made me decide to go with the dining plan. I know that we will be spending 2-3days off property to go to Universal Studios, however with the dining plan it will offer us an opportunity to eat at restaurants I would otherwise not even attempt to go due to the cost. The dining plan offers you an opportunity to eat at the more expensive restaurants for the cost of 2 dining experiences which might just work out fine so that we can use all of our meal credits.
Even if I'm not saving that much money using this dining plan at least I will feel like I saved money!
Our purchase through Disney allowed me the opportunity to place a down payment for our trip so I didn't have to pay for it all up front. This was a really nice option as I can now make small payments each month leading up to our trip so that it's not such a huge shock to pay it all one time (like our honeymoon!).
For now I am thoroughly excited that we will be going to Disney World next year! I will keep you all posted as we count down the days to our first BIG family trip!
Sunday, October 18, 2015
The Countdown to Disney World Begins! 222days to go!
Yep! you read that correct! We are now counting down the days until we make our first trip to Walt Disney World as a family!
I can't believe that Bo has finally agreed that we should take the plunge and take Trent to Disney World! YAY!
Ok ok...now it's time to review, how did we get to this point? It's been a long while since I've posted anything on my blog!
I finally graduated from UH Manoa with my Master's in Nursing and I did a dual degree in Family Practice Nurse Practitioner and Public Health Nursing. Shortly after graduating Bo finally proposed!
I landed my first job at Kauai Medical Clinic as a Geriatric NP (not my specialty) in February, it is my first job as an NP and many people tell me the first jobs are usually the hardest. I will soon be leaving this job at the end of October and I will start my new position at Hoola Lahui Hawaii as an outpatient Family Nurse Practitioner and I couldn't be more excited. Yes there was a pay cut but what is the cost of your happiness especially fulfilling your lifelong dream and following your passion?
We got married May 10, 2015 and it was one of the best days of my life (right next to holding Trent for the first time). You know we made lots of the decorations ourselves! I will post another blog with the crafts from our wedding and other fun things we did. We went on our honeymoon to Alaska in July, it was both of our first times on a cruise...I will also post a blog on our tips and how amazing it was!
Trent started Kindergarten at Kawaikini, a Hawaiian language public charter school. I am beyond blessed to be able to share my schooling experience with him. He is learning from all my past instructors and he will even be learning from one of my best friends when he reaches 1st grade. He is enjoying school and is learning so much, he is still slow to make friends but he is getting there :).
It is now October, almost the end of the month already! I can't believe that time has flown by so quickly! Trent has decided our costumes for us and I am more than happy to oblige. This year we will be a cast from Disney's Nightmare Before Christmas. Trent will be Jack Skellington, I will be Sally, and Bo will be a ghost (it's a t-shirt! it's all I could talk him into this year). We will be decorating the house during this week so that Trent can enjoy the festivities more, We might also have a pumpkin carving day with him and Hayden this up coming weekend. Trent asked Hayden if he would like sleep over with us and next weekend is the only one this month when Bo and I are both off, so we will be doing some fun activities, I will try to stay updated and post about them as we do them.
And now onto our super exciting news! After years of contemplating if we could do a Disney trip we have finally found ourselves in a position where we can actually go and enjoy ourselves. Also we found out that Hawaiian airlines has decided to make airfare ridiculously overpriced ($172 one way to Oahu) that a trip to Oahu is out of the question for us this holiday season.
Earlier this month I was looking into booking us a trip to Oahu for the holidays to spend some time with my Mother, Ethan and his family (oh yeah my brother had a super cute baby girl Olivia in January and he and Malena got married in March of this year) and I found out the price for the three of us to go to Oahu would be over $1,000 which got me thinking...how much would it cost to go to the mainland?
I started looking up how much it would cost for a Disney trip as we have talked about this for years. and I learned the airfare for this trip would be under $3,000 for all three of us! Bo said that I should look it up more and so I did a lot of research over the next 2-3 weeks and I finally was able to show Bo that we could afford this trip. There was some back and forth about why we should even go, and my final answer was that now is the best time since Trent will only be 6 when we go, we don't have a mortgage to pay right now, and it would be a good opportunity to go before I get pregnant again (yes we are talking about having another baby within the next 1-2 years). After we discussed this further he finally said that he will support me and that it was a good point that we should go before we have to wait another 5 years to go.
So yes folks we are now 222 days away from our Walt Disney World trip. I have placed a deposit on the trip and I will be booking our flights within the next 2-3 weeks!
Tuesday, April 30, 2013
It's been a while
Wow! I hadn't realized how long it's been since I've posted a blog! Well I'm not procrastinating because I have a final on Thursday, I've been studying and doing papers for the past few weeks...I haven't done any new projects lately because life's been super busy...but I did do a few a couple of weeks ago.
I finally finished my dream/inspiration board. I found an old corkboard outside in my mom's garage and I repurposed it.
I started with painting the wood frame. Some of you familiar to pinterest may notice the rubberband accross the top of the bottle, it worked amazingly! I didn't drip paint anywhere, and I didn't have too much paint for the project!

I tried a few different approaches to repurpose the board (paint, spray paint, impression of leaves), but as you can kind of see some of the board was gouged out, and none of the approaches I was trying really covered this well. SO...I ended up finding a bright fabric that matched my paint and I hot-glue and thumb tacked it on.

I think it took me about 3/4 of a yard to cover the board, and I had to cut the edges so that the frame would show. I couldn't figure out a way to take the cork board out of the frame...but this worked well

It took a few passes with the hot glue gun to get all of the edges of the fabric to stick, I think I also ended up hot gluing some of the thumbtacks in (accidentally). But overall I like the way it came out.

Here it is with some of my things already added. It's put up right over my desk to keep me motivated when I'm studying or working on some papers.


Luckily for me Trent loved this one...I used garlic spam (mmmm...delicious!!!) green onions, onions, bell peppers, and cheddar cheese, with a little extra cheddar cheese on top (after it baked). I think I might make these more often...especially since I'm not a morning person I can just pop these in the microwave for Trent while I wait for my coffee to finis brewing. ;)
I finally finished my dream/inspiration board. I found an old corkboard outside in my mom's garage and I repurposed it.
I started with painting the wood frame. Some of you familiar to pinterest may notice the rubberband accross the top of the bottle, it worked amazingly! I didn't drip paint anywhere, and I didn't have too much paint for the project!

I tried a few different approaches to repurpose the board (paint, spray paint, impression of leaves), but as you can kind of see some of the board was gouged out, and none of the approaches I was trying really covered this well. SO...I ended up finding a bright fabric that matched my paint and I hot-glue and thumb tacked it on.

I think it took me about 3/4 of a yard to cover the board, and I had to cut the edges so that the frame would show. I couldn't figure out a way to take the cork board out of the frame...but this worked well

It took a few passes with the hot glue gun to get all of the edges of the fabric to stick, I think I also ended up hot gluing some of the thumbtacks in (accidentally). But overall I like the way it came out.

Here it is with some of my things already added. It's put up right over my desk to keep me motivated when I'm studying or working on some papers.

As I mentioned before I'm kind of procrastinating on my homework, and I figured what better way to make me feel less like I'm procrastinating than to cook some good food of my son...I made us spaghetti and meatballs. I used a recipe from allrecipes.com for Meatball nirvana....OMG these were super easy and very delicious! but they might have been a bit spicy for Trent...


Unfortunately my son didn't like it because it was too spicy for him...Luckily I was also trying a recipe from Pinterest for easy baked mini omelets. It was super easy...just had to beat some eggs and cut up your veggies and bake! well there may have been a few more steps than that...but I loved it!

Luckily for me Trent loved this one...I used garlic spam (mmmm...delicious!!!) green onions, onions, bell peppers, and cheddar cheese, with a little extra cheddar cheese on top (after it baked). I think I might make these more often...especially since I'm not a morning person I can just pop these in the microwave for Trent while I wait for my coffee to finis brewing. ;)
Thursday, April 11, 2013
Keeping Busy
I worked on that diaper cake I mentioned in my previous blog. I still need to figure out how to decorate it more, but it's the best I can do with what I've got. Her baby shower is gender neutral with a Winnie-the-Pooh theme. I looked up a few different ways to make the diaper cake, I've done a few before but I didn't feel like rolling a whole bunch of diapers. I found a pretty good tutorial through Pinterest, the link leads to Momaroo. Her instructions are pretty good, but the holding with string thing got pretty old when I was trying to be more efficient at adding diapers instead of one at a time. So I ended up using the basic principles of these instructions to make my diaper cake, I did a slip knot around the diaper cake with kite string to make my circles. It took me 3-4 different tries to tie off the string and keep the diaper cake together (meaning it fell apart 3-4 times and I had to start from scratch the same amount of times!).

Anywho, I was finally able to finish the diaper cake...then I ran out of ribbon for the top tier!

Here's the final project, I may decorate it more with other winnie the pooh things, I'm still debating on what's gonna happen with the look but I like this one it came out pretty good...and once I figured out how to tie off the string for the layers it went pretty fast.

While I was still in the mood to decorate the house I came accross a really easy and interesting idea paint the covers of shoe boxes and hang them. It took me two coats of the base color to cover the box completely then I stenciled on the design. I like how it came out!


Oh yeah! I also forgot to mention that I got the paint from Home Depot at their samplle section for $2, I realized that this was pretty cheap for the different colors and it would probably work better on some of the other painting projects I'm thinking of doing later on.
The last project I did was a version of another Pinterest pin. I think it came out pretty cool.

I cut the lines a bit close and some of them broke after I took the picture! oh well it wasn't a good shirt anyways and I was only planning on using it at home or at the beach.
 I added the shirt underneath so that you could see the lines that I cut better. I'm planning on doing another paint project with another bottle and stencil idea. I'm also not sure if I'll be doing another crafting project or a cooking project soon. Oh well, I'm sure something new will come up soon, school is starting to get the best of me and I'm trying my best not to check out just yet! Thanks for stopping by

Anywho, I was finally able to finish the diaper cake...then I ran out of ribbon for the top tier!

Here's the final project, I may decorate it more with other winnie the pooh things, I'm still debating on what's gonna happen with the look but I like this one it came out pretty good...and once I figured out how to tie off the string for the layers it went pretty fast.

While I was still in the mood to decorate the house I came accross a really easy and interesting idea paint the covers of shoe boxes and hang them. It took me two coats of the base color to cover the box completely then I stenciled on the design. I like how it came out!


The last project I did was a version of another Pinterest pin. I think it came out pretty cool.

I cut the lines a bit close and some of them broke after I took the picture! oh well it wasn't a good shirt anyways and I was only planning on using it at home or at the beach.

Thursday, April 4, 2013
I've been busy...
So I just realized that it's been quite a while since my last post. There's been so much going on lately! I had to go to Oahu for school before Spring break, while there I got to stay with my brother and his girlfriend, I got to go see my mom and grandma, and I got to meet up with one of my best friends! It was so much fun, but it felt so short lived. But I digress.
It was actually because of this trip that I was inspired to do some rearranging and decorating around my place, so that it feels more like a place for me and Bo, rather than the obvious that we're living in my mom's place. I've been on Pinterest a lot lately looking up some decorating ideas and such. Here's what I've done so far.
I upcycled a mirror, the frame used to be a plastic with a wooden pattern. I just taped newspaper to the mirror (because I couldn't take off the frame) and spray painted it for the base color, then I stenci
led some flowers on with acrylic paint. I also added a wall cling of my favorite flowers to the area to give it a little more ME :p

I went to some consignment stores and found some cheap picture frames and I tried to upcyle these as well to make some "new" wall art. The first one I did, I just spray painted the press wood black and I added some scrapbook stickers and paper to the matting to make the picture look different. The second one (which I will be re-doing) I glued fabric to the back, cut out some letters taped down onto fabric and painted over...I don't like it much because I used the wrong color to paint over the letters.


I really liked the wall stickers so I kind of got a few...maybe a lot but they make the rooms look so diferent! I love them. I'm waiting for a few more to come in, they're just words so that I can add them to the pretty leaves and such.


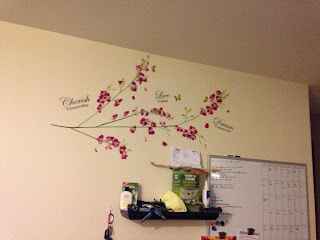 This last one actually has it's sayings up it says "Cherish yesterday, live today, and dream tomorrow"
And finally the last project I did was an upcycled wine bottle. I stripped it of the label which was actually easier than I thought (I soaked it in warm water and then under running warm water I scraped it off with a spoon, to make sure I got all the sticky stuff off I wiped it down with goo-gone and one last wipe with vinegar to make sure all the goo-gone was off) spray painted it white, traced a stencil on with pencil, then hand painted in the stencil with acrylic paint...I think this one took the most time but it came out so nice! I really like this one...Now I gotta figure out where to put it!

Next I'll be working on a diaper cake for my girlfriend's baby shower next weekend, I'm in charge of it and we're doing a gender reveal baby shower, so I know what she's having, but she and her husband have no idea! should be exciting! I'll keep you posted!
I'm not really sure what the next projects will be but it's getting closer to finals week, and my procrastination and stress levels are starting to increase....hopefully I can keep it under control, but I'll keep updating as much as I can. Thanks for stopping by!
It was actually because of this trip that I was inspired to do some rearranging and decorating around my place, so that it feels more like a place for me and Bo, rather than the obvious that we're living in my mom's place. I've been on Pinterest a lot lately looking up some decorating ideas and such. Here's what I've done so far.
I upcycled a mirror, the frame used to be a plastic with a wooden pattern. I just taped newspaper to the mirror (because I couldn't take off the frame) and spray painted it for the base color, then I stenci
led some flowers on with acrylic paint. I also added a wall cling of my favorite flowers to the area to give it a little more ME :p

I went to some consignment stores and found some cheap picture frames and I tried to upcyle these as well to make some "new" wall art. The first one I did, I just spray painted the press wood black and I added some scrapbook stickers and paper to the matting to make the picture look different. The second one (which I will be re-doing) I glued fabric to the back, cut out some letters taped down onto fabric and painted over...I don't like it much because I used the wrong color to paint over the letters.


And finally the last project I did was an upcycled wine bottle. I stripped it of the label which was actually easier than I thought (I soaked it in warm water and then under running warm water I scraped it off with a spoon, to make sure I got all the sticky stuff off I wiped it down with goo-gone and one last wipe with vinegar to make sure all the goo-gone was off) spray painted it white, traced a stencil on with pencil, then hand painted in the stencil with acrylic paint...I think this one took the most time but it came out so nice! I really like this one...Now I gotta figure out where to put it!

Next I'll be working on a diaper cake for my girlfriend's baby shower next weekend, I'm in charge of it and we're doing a gender reveal baby shower, so I know what she's having, but she and her husband have no idea! should be exciting! I'll keep you posted!
I'm not really sure what the next projects will be but it's getting closer to finals week, and my procrastination and stress levels are starting to increase....hopefully I can keep it under control, but I'll keep updating as much as I can. Thanks for stopping by!
Monday, March 18, 2013
First Time Quilting
For the past few weeks I have had the urge to do a sewing project. I finally go out my mom's sewing machine and worked on a project that I found on Pinterest (as you can see this is my go-to idea site). Here's the original tutorial I found to do this project. What I didn't realize when I began doing this project was that the bigger the letters the easier it would be AND I happened to have chosen rounded letters instead of straight edged letters whic turned out to be much more difficultthat I had originally planned! oh well..we live and learn.
I chose to make the letters smaller than the original tutorial primarily because I had a limited amount of fabric to work with. My letters were size 250 font, I believe the original tutorial has letters that are size 500...well something much bigger than mine were!


After the first two letters I realized that I was in for a world of cramped hands and sore fingers!


But it was all worth it! Trent loves these letters, he has been working on his alphabet a lot lately and has been singing his alphabets at least five times a day! I decided that we would do another coloring project with the paper tracings used for this project, he's actually coloring them right now. No idea what we're going to do with them yet but I'll definitely keep you posted!

Friday, March 1, 2013
Baked cheese balls
So I have been itching to try this recipe because it looks so simple...cut cheese sticks, dip in milk, bread and bake....simple...Pinterest is infamous for making things look more simple than they are...so here's my story...It was actually based off of Pintester's blog about this recipe that I decided I could do this with a few tweaks.
So I think my first mistake was making bread crumbs without first toasting the bread...I'm still not sure if this was a mistake or not because I've never made bread crumbs from scratch before, but I know that I've used them before (panko) and they're usually pretty stiff...not soft like mine were :p
 Yeah...what kind of asian household do I have if I don't even have panko!?!? I know I know...oh well. So I made the bread crumbs (soft crumbs). cut the cheese and all I was supposed to dip it in was milk. But because I've breaded chicken before for fried chicken I know that dipping in just milk won't be enough, so I added an egg to the milk before dipping the cheese in the bread.
 I was pretty proud of myself by this point because the bread crumbs were sticking well to the cheese! Then I realized I didn't add any kind of seasoning to the bread crumbs before dipping the cheese in. So I decided to just sprinkle the finished product with italian seasoning before throwing them into the oven. (I forgot to take a picture while it was in the oven.)
 They melted!!! they were supposed to turn out like little round breaded cheese balls. Even the pintester was able to keep them in round form...they look kind of round in the top picture, but by the time I took them off the pan they were all melted and flat! :p

It was still tasty, but I think next time I'll just dip the whole cheese stick in the bread crumbs! In retrospect it could have been the bread crumbs, the egg, or the size of the cheese balls, but it may also have to do with the fact that I used the convection setting on the oven instead of the regular bake....idk but it was still fun to try! Maybe next time I'll use a real cook book instead of going based off of a picture and it's caption! LOL
So I think my first mistake was making bread crumbs without first toasting the bread...I'm still not sure if this was a mistake or not because I've never made bread crumbs from scratch before, but I know that I've used them before (panko) and they're usually pretty stiff...not soft like mine were :p


It was still tasty, but I think next time I'll just dip the whole cheese stick in the bread crumbs! In retrospect it could have been the bread crumbs, the egg, or the size of the cheese balls, but it may also have to do with the fact that I used the convection setting on the oven instead of the regular bake....idk but it was still fun to try! Maybe next time I'll use a real cook book instead of going based off of a picture and it's caption! LOL
Subscribe to:
Posts (Atom)